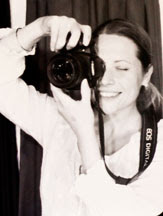
Portraits


I have expanded my business to include Portrait sessions.
I have shot 6 teenagers in the past two weeks and am LOVING it! I have so missed being around teenagers, since leaving teaching. These fun photo shoots have been so rewarding and exciting.
I have put up 4 new galleries on my website, feel free to go take a peek. There will be many more additions in the upcoming weeks.
I have officially gone on "vacation" from my two etsy shops for the next two weeks to get the portrait aspect of my business running smoothly and efficiently. Prints of my fine art photographs are now available on my website, and I will be reopening my etsy shops again in 2 weeks. There are a few things in the works around my Monarch store, and I will update you as they materialize.
I was negligent in getting up the tips about textures so here they are in rough form:) There are great tips on textures in {ash} on flickr and from redleaf .
On to my silly tutorial:
1. Open the photograph in PS that you would like to apply the texture to.
2. Open the texture photograph and be sure that you go into image>size for both and that the resolution is the same.
3. Click on the + icon in the PS menu and then drag the texture photo onto the photo you opned to apply the texture to. That was a run on sentenece:)
4. Now go to the layers palette and click on the window that says normal-you should get a drop down menu with many options. I am new t this so I just go through all the options and then usually settle on soft light or overlay. Then I adjust the opacity.
5. Now when using textures over people-often you will want the texture to be more transparent there than in the rest of the photo. I came across a tip somewhere that you can highlight the texture layer in the layers palette and then go to the lasso tool in the menu bar to the left. trace around the face/part of the photo you want to have less of the texture on. Once you have closed the selection by meeting the point where you started the lasso-you will see the marching ants line around it. Now go to select>inverse.
6. Now go to filter>blur>gaussian blur and select maybe 10 to start. Press ok. You should now be able to see more of the face/object now that the texture is blurred.
Good luck.
I am super duper busy so that is why I have been so absent. Hopefully things will get into a steady rhythm and I can post about other techniques I am learning.


